Whether you are managing your blog as a part-time hobby or doing an online shop to earn lucrative profits, WordPress content management has you covered. It is the most popular content management system that can be used to create easy to handle and pretty to look websites. However, in order to run WordPress, you will need to install a database server, PHP server scripting modules and a web server.
Fortunately, there are open source software that are making it easy as hell to install WordPress on Windows 10 computer. XAMPP is one such program that is easy to install and free to use. Here’s how to install WP on Windows 10 with XAMPP.
How to Install WordPress with XAMPP on Windows 10 Computer?
To get WP on Windows 10, follow the following steps:
1. Download XAMPP Server Package
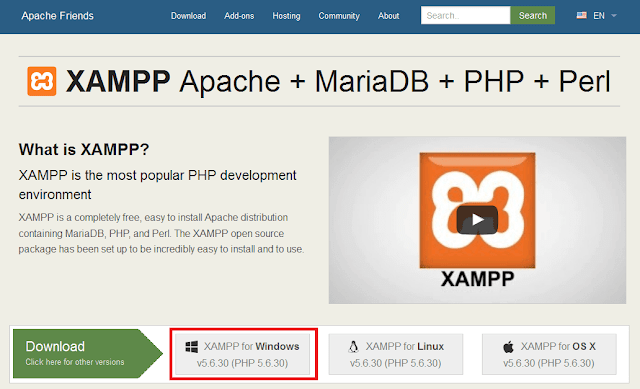
In order to get started with the XAMPP on your Windows 10, you need to get it downloaded. Click the link to download the complete XAMPP Package on your computer.
2. Install XAMPP Server
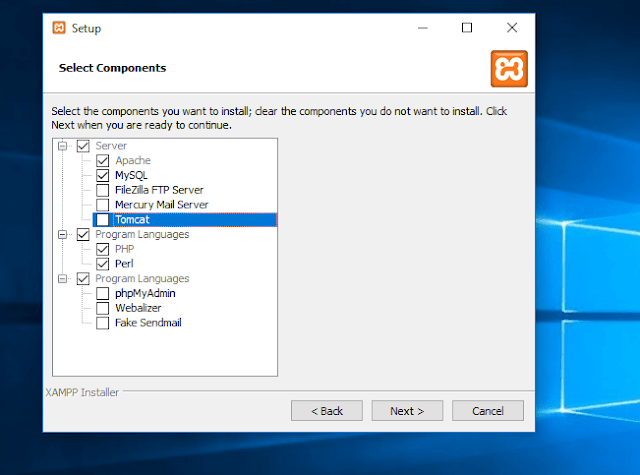
After getting the package downloaded, install the program. You will need to install the package with Apache, MySQL, PHP and Perl. Wait until the installation process is completed.
3. Configure XAMPP Server
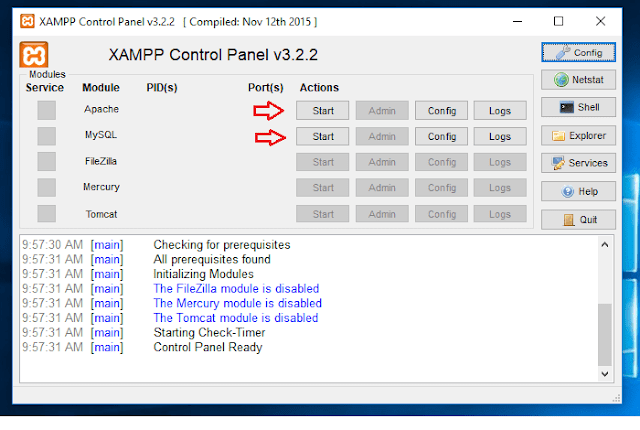
After the package has been installed, you need to open the XAMPP file and start up MySQL and Apache services. In order to make sure if these services are running, open Internet Explorer on the host machine and type http://locahost. This would bring up the default XAMMP page.
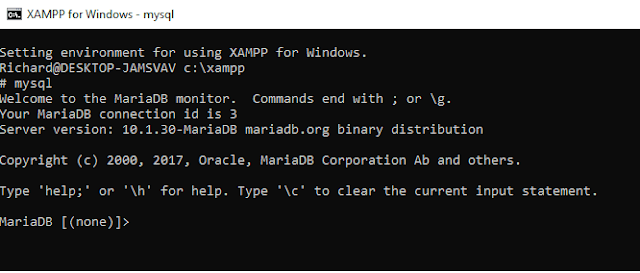
Now in order to validate MariaDB is installed and functioning, you need to open the Shell command prompt on the right of XAMPP Control Panel. This would launch the command shell. There type, mysql. It would prompt you onto MariaDB database server.
Open Shell command windows again, in order to secure MariaDB database server. From there, type:
perl\bin\perl.exe mysql\bin\mysql_secure_installation.pl
This will prompt you to the next page where you need to answer the question from the guide below.
- Enter current password for root (enter for none): Just press the Enter
- Set root password? [Y/n]: Y
- New password: Enter password
- Re-enter new password: Repeat password
- Remove anonymous users? [Y/n]: Y
- Disallow root login remotely? [Y/n]: Y
- Remove test database and access to it? [Y/n]: Y
- Reload privilege tables now? [Y/n]: Y
4. Create WordPress Database
While still in the Shell command windows, type the following commands to login to MariaDB database server. Type the password you entered above when prompted.
mysql -u root –p
Then create a database called wpdb
CREATE DATABASE wpdb;
Now create a database user called wpuser with new password
CREATE USER ‘wpuser’@’localhost’ IDENTIFIED BY ‘new_password_here’;
Then grant the user full access to the database
GRANT ALL ON wpdb.* TO ‘wpuser’@’localhost’ IDENTIFIED BY ‘user_password_here’ WITH GRANT OPTION;
Finally, save your changes and exit.
5. Download WordPress Content
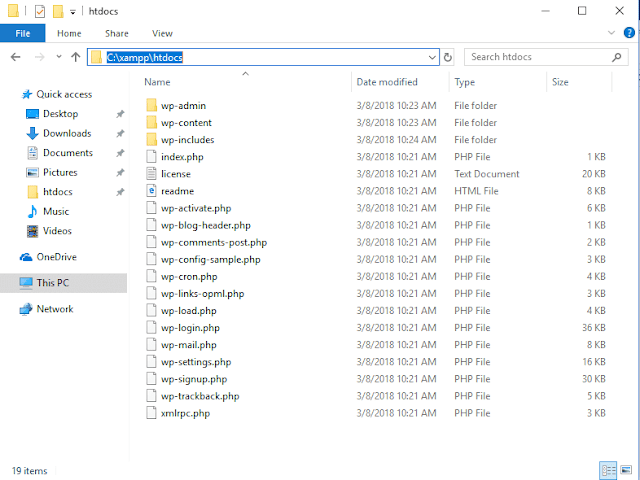
The WordPress database has been created now. You need to download WordPress package from its downloading page. After downloading the WordPress zip package, extract it into C:\xampp\htdocs.
You can delete all the files and folders under HTDOCS folder and extract WordPress files. When done, open Chrome Browser and type:
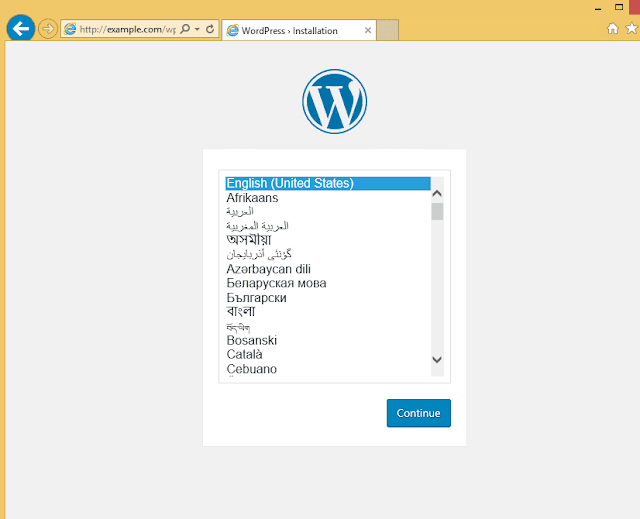
This type you should see WordPress default setup page.
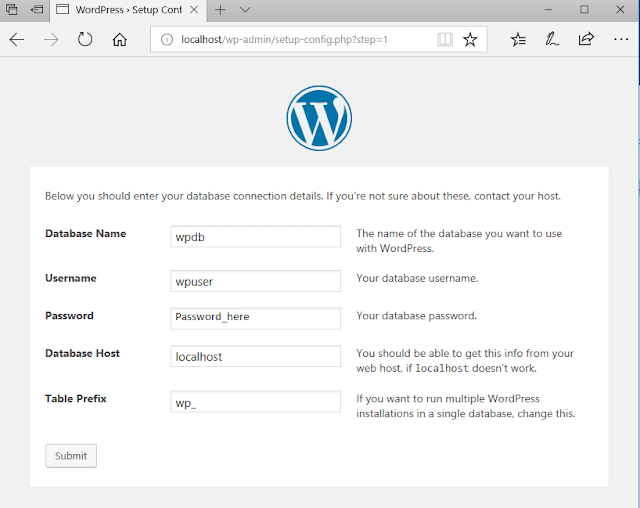
Now type in the database connection info and continue.
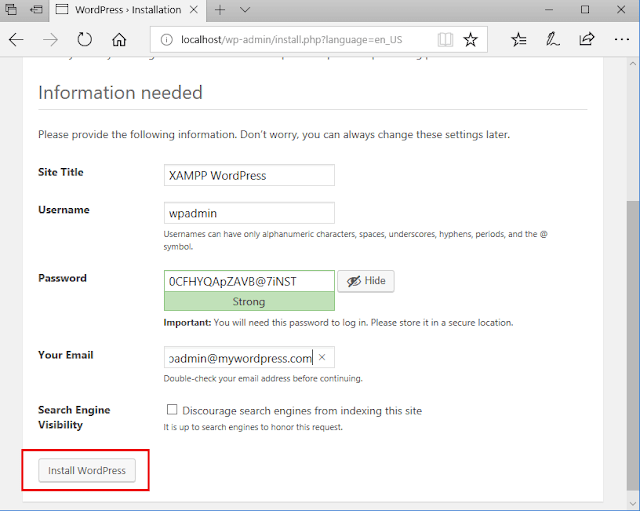
Create WordPress admin account and continue. After installing, logon to WordPress admin dashboard.
That’s it! You are good to go with brand new WordPress installation on your local windows 10 computer.
- Top 5 Best Disk Partition Manager Software for Windows 7 | 8 | 10 | 11 - October 4, 2024
- AIMP Music Player 4.52 Offline Installer Setup for Windows 7, 8, 10, 11 - October 4, 2024
- ApowerMirror Control Android Mobile Phone or iPhone from PC | Windows 7, 8, 10, 11 - October 4, 2024



![BitNami WordPress Stack Installer 5.2 64 Bit [Windows 7, 8, 10, 11], Mac OS X BitNami WordPress Stack Installer 5.2 64 Bit [Windows 7, 8, 10, 11], Mac OS X](https://www.getpcapps.com/wp-content/uploads/2019/05/Install-WordPress-Locally-on-Windows-and-Mac-1-150x150.jpg)


![Download OpenOffice 4.1.10 [2024 Latest] Offline Setup | Windows 7, 8, 10, 11 Download OpenOffice 4.1.5 Offline Setup for Windows 7 | 8 | 10 | 11](https://www.getpcapps.com/wp-content/uploads/2018/06/Apache-OpenOffice-download-windows-offline-installer-getpcapps.com_-1-150x150.jpg)


